Local authentication setup
This guide walks you through configuring Local Authentication in Ohlala Operations for Amazon EC2.
Prerequisites
- Ohlala Operations for Amazon EC2 installed and running
- Network connectivity to Ohlala Operations for Amazon EC2 web console.
Step 1: Access the Authentication Settings
- Open Ohlala Operations for Amazon EC2 URL.
- Navigate to the wizard on
/wizardurl. It should bring you there by default on first launch. - Read and accept the disclaimer.

Step 2: Select Local Authentication
- Choose Local Authentication as the authentication method.
- Click Next to proceed.

Step 3: Create a Local Administrator Account
- Enter the Username for the local admin account.
- Set a password.
- Confirm the password.
- Click Next.

Step 4: Active Directory integration (optional)
- Enable or disable Active Directory integration. This will allow you to join your Microsoft Windows EC2 to your Active Directory domain from the Ohlala Operations for Amazon EC2 console.
- If you choose to enable it, go to step 5. Otherwise, go to step 7

Step 5: Active Directory parameters
- Provide the IP adresses of your Domain Controller address. They must be reachable from within your VPC.
- Enter your Domain Name (e.g.,
example.local). - Enter the username of the AD service account
- Enter the password of the AD service account
- Click Next. We will test connection to Active Directory before moving to the next screen.

Step 6: Default Organizational Unit
- Select the distinguished name of the Organisational Unit where you will join EC2
- Click Next.

Step 7: Default setting
- Enable Default Host Management Configuration. This is recommended to simplify your EC2 administration. Feel free to disable it if you wish to managethe SSM permissions of your instances.
- Set the default refresh interval of your EC2 data. We recommend setting it between 30 and 120 seconds.
- Proceed by clicking Next.

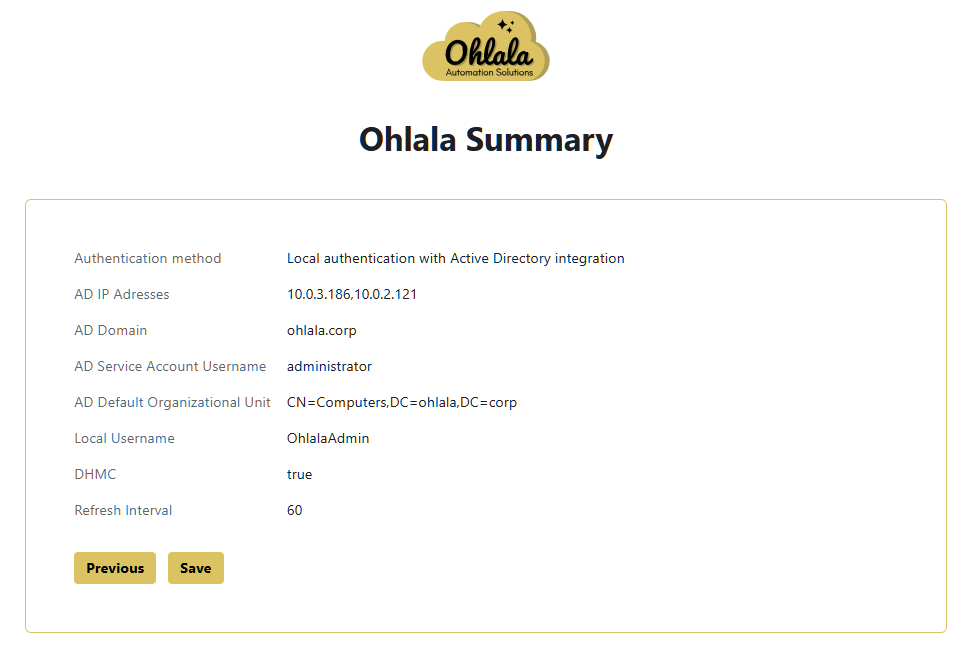
Step 8: Review and Confirm
- Verify the entered details.
- Click Save to apply the configuration.
- Local authentication is now enabled!
Without Active Directory integration:

With Active Directory integration:

Troubleshooting
If you encounter issues:
- Ensure the entered credentials meet security requirements.
- Restart the Ohlala Operations for Amazon EC2 EC2 if changes don’t take effect.
- Check system logs for authentication errors.
For additional support, refer to the official documentation or contact support.
✨ Ohlala Operations - Automate Windows Server Management on AWS! ✨